I found out about this technique from an online post from a photographer in Russia. You may have seen it, he took some amazing pictures of snow flakes by attaching a lens backwards to a cheap point and shoot camera.
I did the same thing. I took my telephoto lens at 70mm and my 18-55mm lens and combined them to make a microscope. I first had the telephoto at 300mm, but that turned out to be too much for now, but I might experiment with that later..
Here's a picture of my set up. The little lens is stuck backward to the long lens which creates a massive magnifying effect.

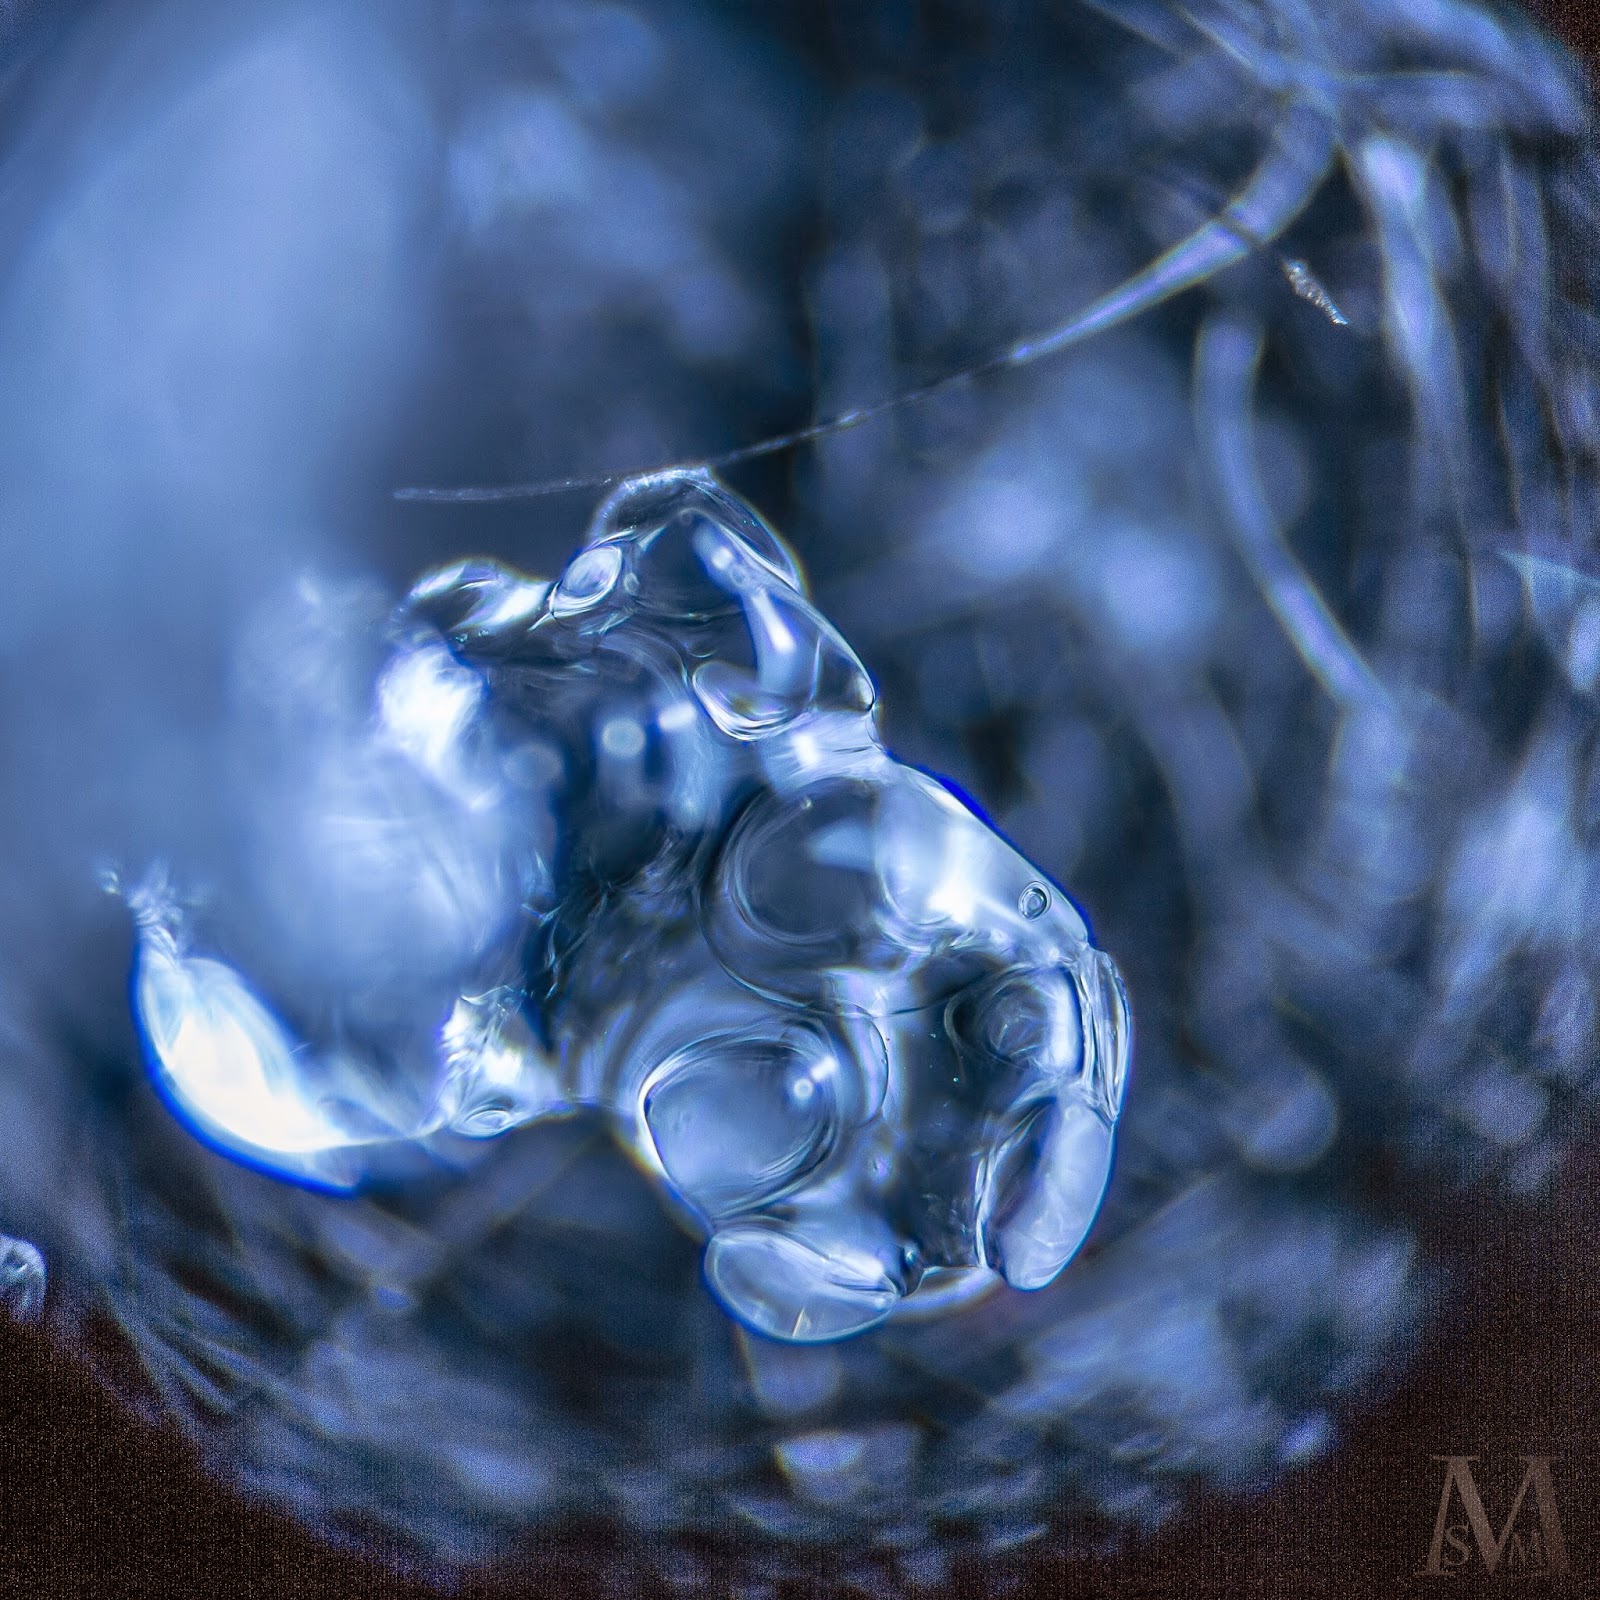
Below the lens I had a black cloth that I put some "snow" on. The snow was really old and melted so it was more of ice chunks that snow. :( so no awesome snow flake pictures, but some really cool ice crystal designs!
I shot at f3.5 to get the most light in, and also so that I could get the biggest crop. When you stop down, the iris actually cuts off the light from the other lens, so that you get a cropped picture. The smaller the iris, the smaller the crop. I could zoom in a lot, or I could get a lens that had a really wide aperture to put on the end of my other lens.
I used a flash to freeze and light the picture. Being a microscope for all intents and purposes, even my hitting the shutter gave massive shake, so I used a flash to freeze and really light the scene. I also used a remote trigger to keep shake to a minimum.
The cool thing about this whole this is anyone can do it with any camera. All you need is a old SLR lens (so cheap on Ebay) and put it backwards up against your camera. It will make an awesome macro lens that you can take amazing pictures with.
To edit these pictures, I first cropped them down to get rid of all the black space. Then I raised the clarity, shadows, and blacks. This gave the image more dynamic range and dramatic lighting. I went over to Ps and applied my high pass filter sharpening action (kind of a preset in Ps terms). I tweaked the setting for each photo in Lr, but basically that's what I did for the photos. Simple editing that wasn't that involved.
Except for one picture. I had taken the same image at two different focus lengths, so I had different parts of the image in focus. I took these two images and composited them in Ps by the use of layer masks. They're not perfect, but pretty close.
Speaking of focus, I didn't actually touch my focus ring the whole time. The way I focused was to move the whole camera up and down. I could be really precise about this and at the same time have minimal shake. My tripod had a telescoping center column, so I just used that to focus the camera! Up to focus closer, down to focus far away. It's a really simple method that is actually extremely useful for normal photography too. This allows much more precise focus as you adjust it really slowly and use your whole body to stabilize it.
Anywho, here's the images. Hope you like them! See you tomorrow!


No comments:
Post a Comment